Is it time for True Confessions? Here’s mine: I’m not an artist.
That’s not to say I’m not creative. It just means that I can’t really draw, or paint or sculpt. Nothing like that.
I certainly wish I could, as I get great ideas that are then rather tough to execute!
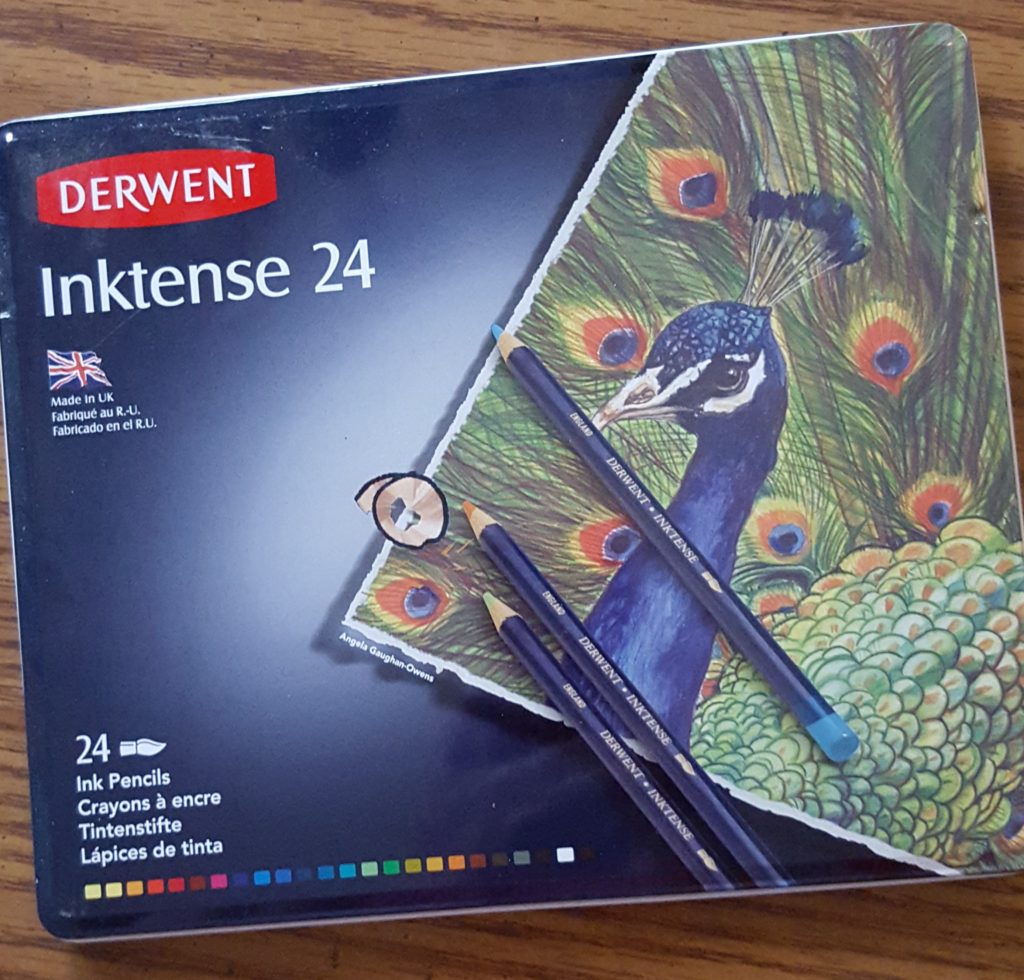
Last year, an online sewing friend introduced me to Derwent Inktense Ink Pencils. I had never even heard of such a thing before. These things look like ordinary colored pencils. They act like colored pencils when you use them. Until you add a bit of water, or other liquid activator. (one can use Textile medium or aloe vera gel!) This mixes with the dried pigments and turns the color to ink! It’s pretty amazing actually.
The colors become bold and vibrant and just…jump right off the page!
You can see that I bought a set of 24. These things are a little bit pricey so you might want to do some price checking, or try to get them with a coupon, etc. Because the colors are blendable, you might be happy with a set of 12, which is more reasonably priced.
Here’s a link so you can read more about this product. Derwent Inktense pencils set of 24
My friend, Judy, is a wonderful artist. She was able to free-hand all sorts of lovely ideas. I tried a very simple item or two and set the pencils aside. For basically a year! lol.
A few days ago, inspiration struck out of the blue!
I began to wonder if I could cut a simple heat transfer vinyl outline design with my silhouette Cameo II cutter. If I ironed this on my cotton blend interlock fabric could I then use the ink pencils to color in the design?
I bought a commercial license for this design. (this photo belongs to Ginaccreates)
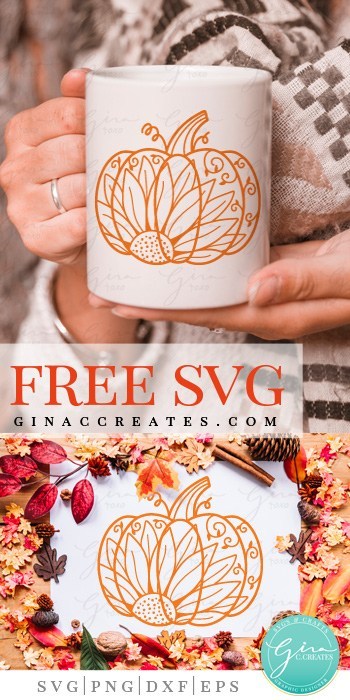
which you can download free, if you’re using this only for personal use. If you want to sell items you’ve made with this design, you’ll need to pay a fee for that. In this case it’s a very reasonable $2.99. Check it out here: https://ginaccreates.com/pumpkin-sunflower-mandala-svg-cut-file/
Using my Silhouette software I chose to separate the stem from the body of the pumpkin, choosing glittered heat transfer vinyl to cut the stem in brown and the pumpkin itself in orange.
When working with Inktense pencils on fabric, it’s important to choose white or other light colored fabrics, in natural fibers. It is my understanding that the ink will penetrate natural fibers but it tends to just ‘sit on top’ of synthetic fibers. This may compromise it’s permanence, even with various methods to set the ink. (more on that later, for now, choose natural fibers!)
I dug through my tub of interlock knits and pulled out this variegated creamy-tan cotton knit. It had previously been laundered so it was ready to go! Cut the vinyl for the pumpkin design and used my heat press to iron it on the lower front of my project.
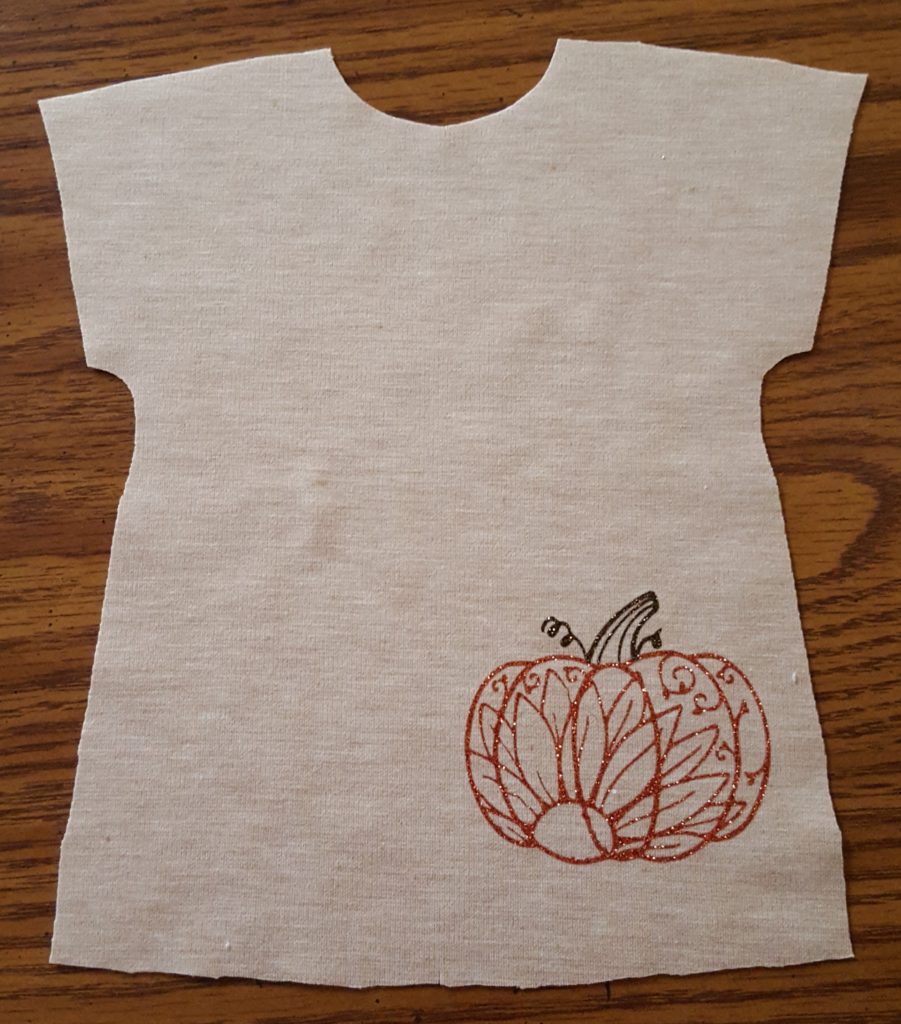
Wowza, it already looks pretty good, with no added color! Let’s see what these pencils can do…
I always like to start small and easy. I used a blend of leaf green and willow to color in the stem.
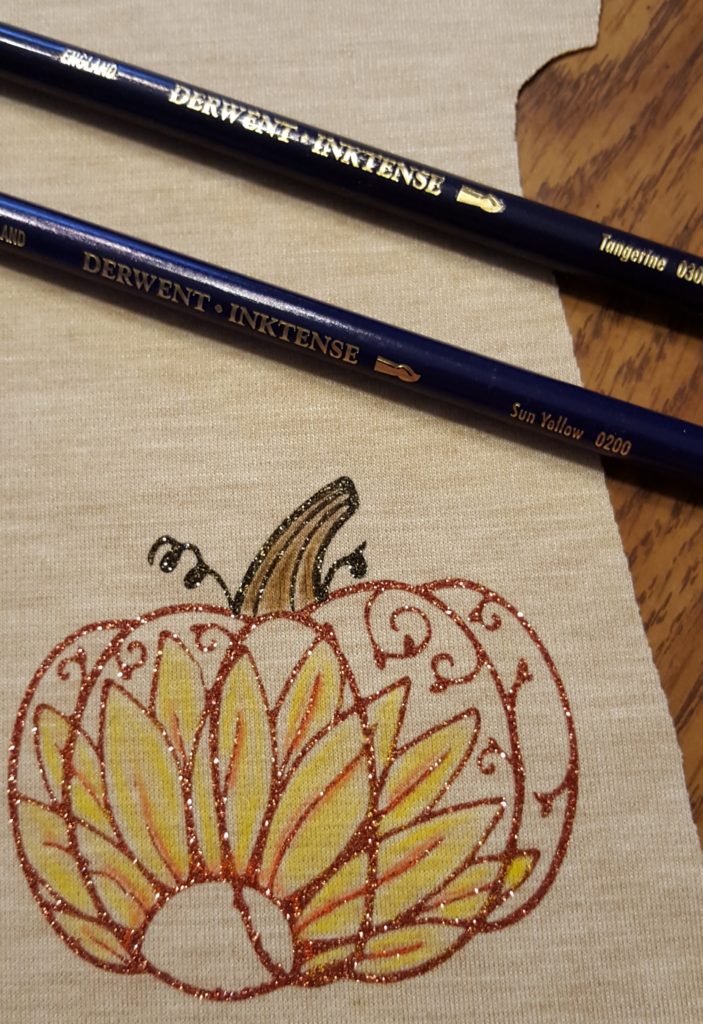
Moving on…a little sun yellow for the sunflower, and tangerine to highlight the details there. This is bringing back all the joy I used to find in my coloring books when I was a kid! It’s relaxing and it’s fun to see the picture taking on new dimension with color.
Now for the pumpkin itself. I started with poppy red. Let’s be honest, I didn’t read the name on the pencil and it appeared to be a burnt orange until I started coloring with it! lol. Seeing this was more of a red, I simply used a very light hand and considerrf this a background. Adding tangerine on top brought things back to orange! Bark (brown) was perfect for the background of the sunflower center.
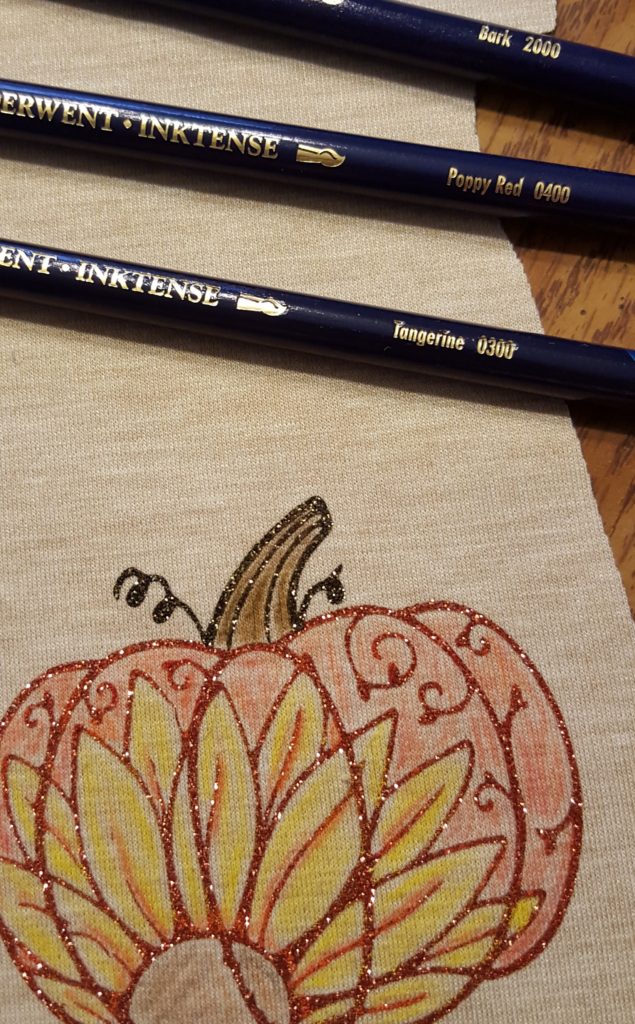
It doesn’t really look finished, but I felt it was time to stop. It’s so easy to keep going until you over do it. Remember finger painting when you were young? Everything was going along great and all of a sudden you’ve got muddy black!
A few notes on the how-to’s are good about now. If you begin an online search for information on ink pencils you’ll find any number of tutorials filled with advice! The magic of the internet can be a really good thing. I knew from the little bit I’d read that the colors would become more vibrant when I added water. Let’s do that next.
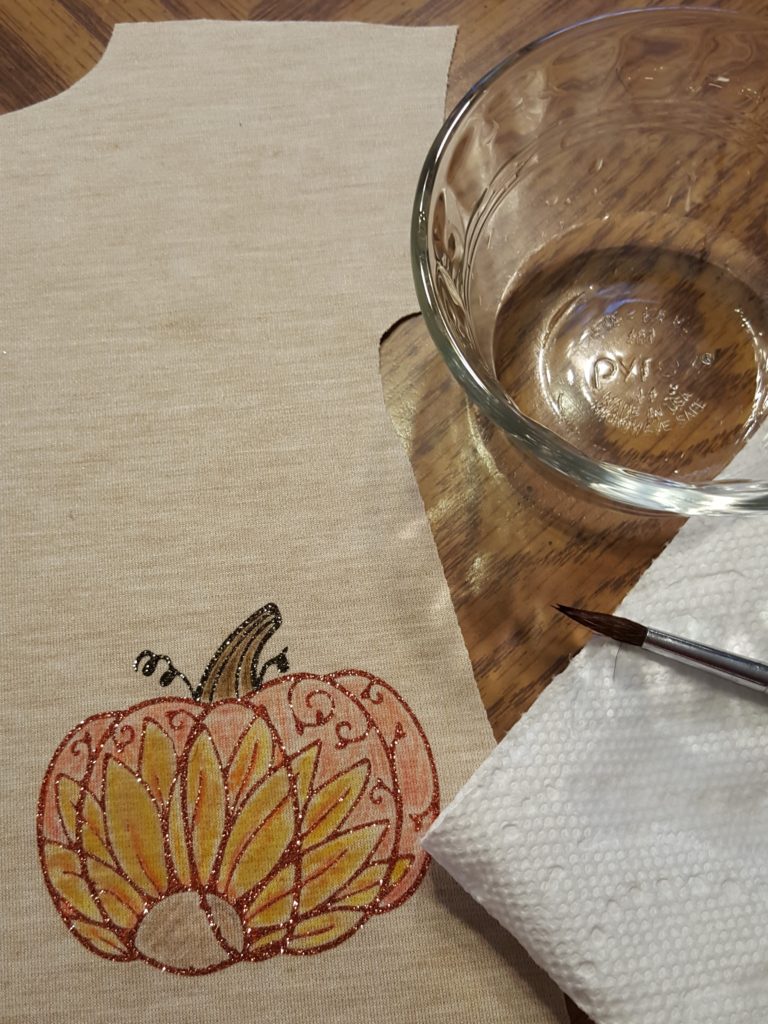
Don’t miss my fancy set up here! A custard cup dish with a bit of water, a paper towel (for blotting off my brush) and a cheapy paint brush left behind from one of the kid’s old watercolor sets. If you study this pic a bit you’ll see that I’ve only just done the sunflower petals. All that means is that I dabbed my brush in the water and barely touched the petal sections with the brush. That’s it! and the color ‘blooms’ before you eyes!
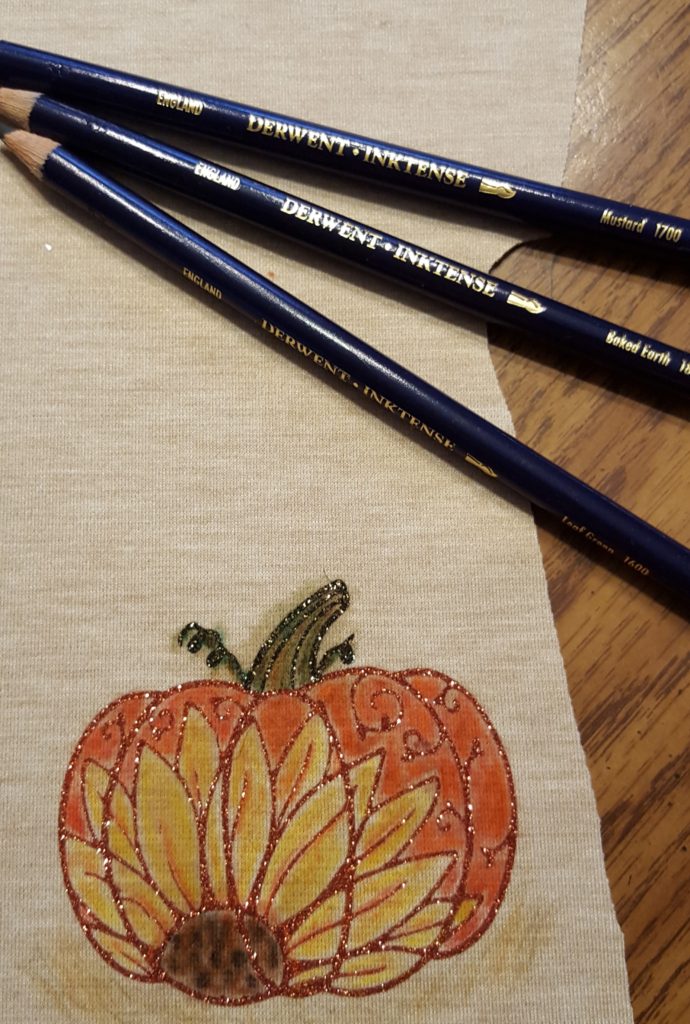
In this photo you see a number of additional details. i used pencil dots of the ‘baked earth’ color to resemble sunflower seeds in the flower center. I also outlined the tendrils around the stem with the leaf green. I used a combination of ‘mustard’ and some of the brown tones to lightly stroke in what I hoped would like straw under and around my pumpkin. (and here we see my lack of artistry! lol) All in all, though, I’m so happy with this!
I did decide that the pumpkin design was a bit smaller than originally intended and it made the rest of the dress front look a bit too plain. Quickly, I selected a font and cut a cute phrase out of glittered heat transfer vinyl in orange. Since I wasn’t sure how the ink would take to the heat press, I took care to make sure the pumpkin design extended off the press and would not be under the platen when I pressed on the phrase.
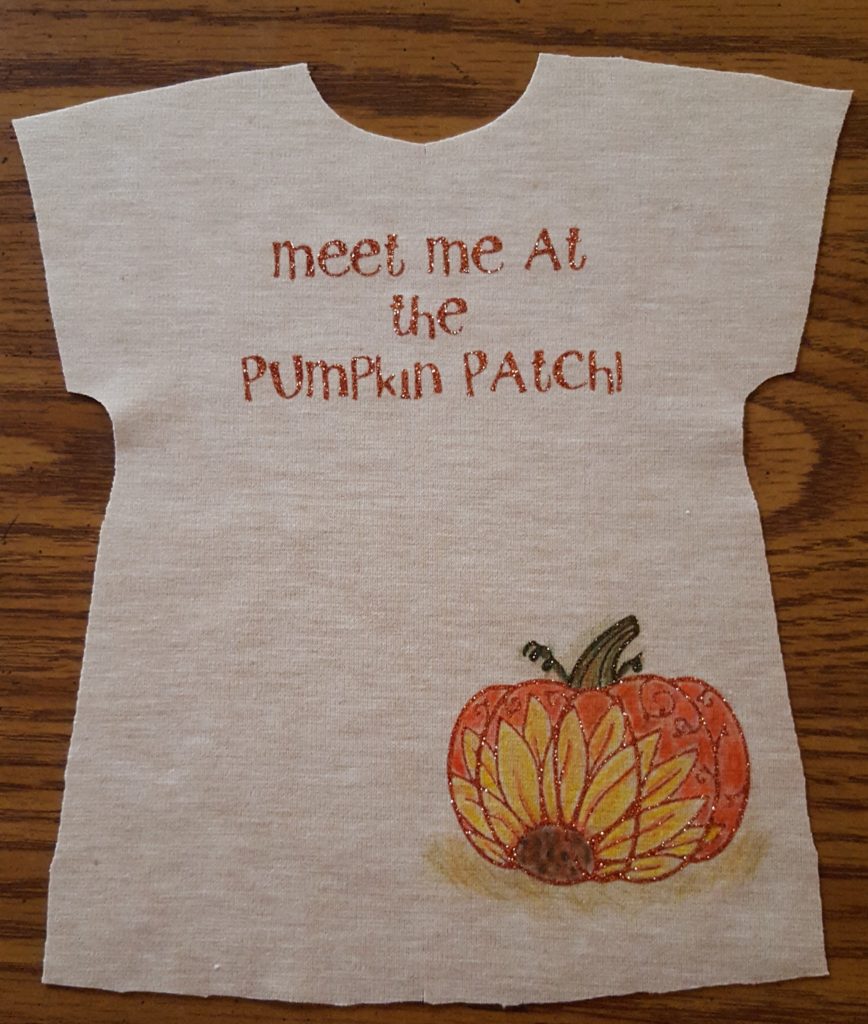
Bedtime, and a good thing, too as it’s best for the ink pencil work to have a rest. It all needed to dry well, though it is not soppy-wet, just damp. (Online info warns that this IS ink so protect your surfaces. I should have put a piece of parchment paper under the fabric while I worked to protect my tabletop. There was no damage to it, but it’s best to be safe!)
At my next session I placed the fabric face down on a teflon pressing sheet (or you could sub in a sheet of parchment paper) and gave the back of the fabric a good press with a hot dry iron. This will set the ink, making it permanent.
I proceeded with the construction of my dress. Yes, it’s an Ezy T, no surprise there, right?
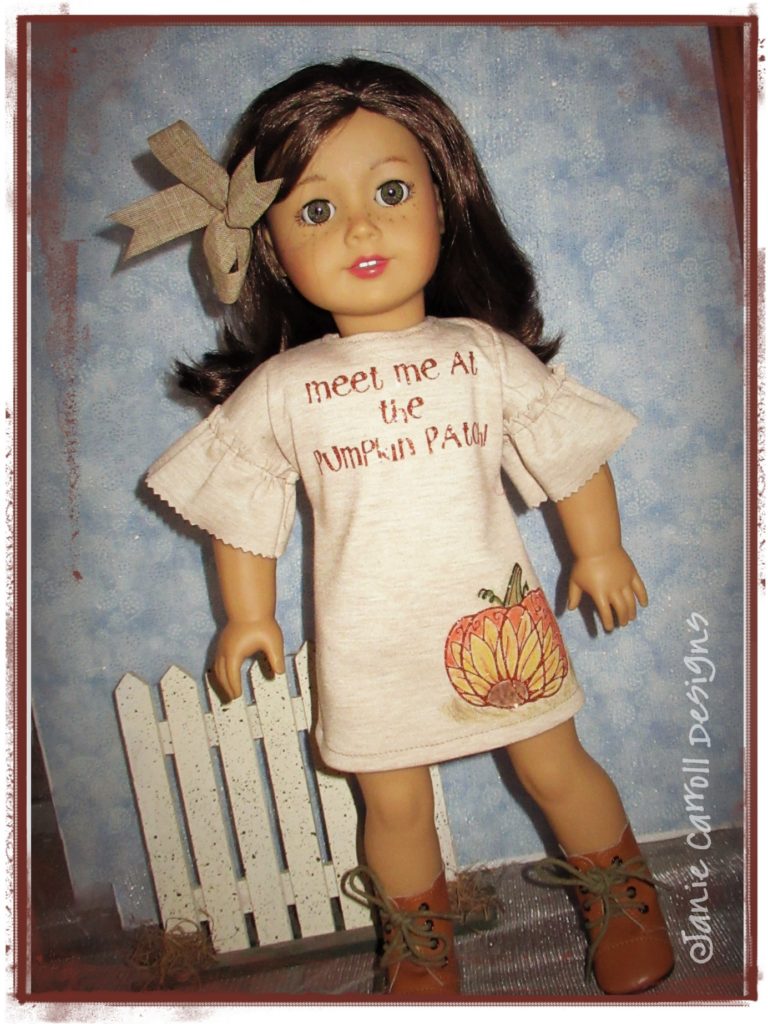
It all looks great, ehxactly as I imagined it might! Notice anything there with that Ezy T? Yes – the gathered sleeve ruffle is new. An Ezy T supplement with sleeeve ruffles, flounces and cuffs will be out in the next few weeks. More great ways to enhance your Ezy T’s.
By this point, I was feeling really excited! The possibilities for the combination of heat transfer vinyl outlines and ink pencil art work is endless! I love Pinterest so I started an inspirational search there and almost immediately hit on the idea of mandala art.
I found an image I could transform into a cut file, resized it and selected Siser brand ‘Video Flex Glitter’ in silver, for my outlines. While I love standard glitter heat transfer vinyl I had not tried the Video Flex product previously. It’s super thin and highly reflective. The look of it reminds one of very shiny tinfoil when applied. Both of these designs are actually the silver-tone. The reflective nature and low indoor light makes the design on the gray fabric appear to be golden. They are both gorgeous, though I made the design on the gray a bit larger, wanting more of a ‘full front’ effect.
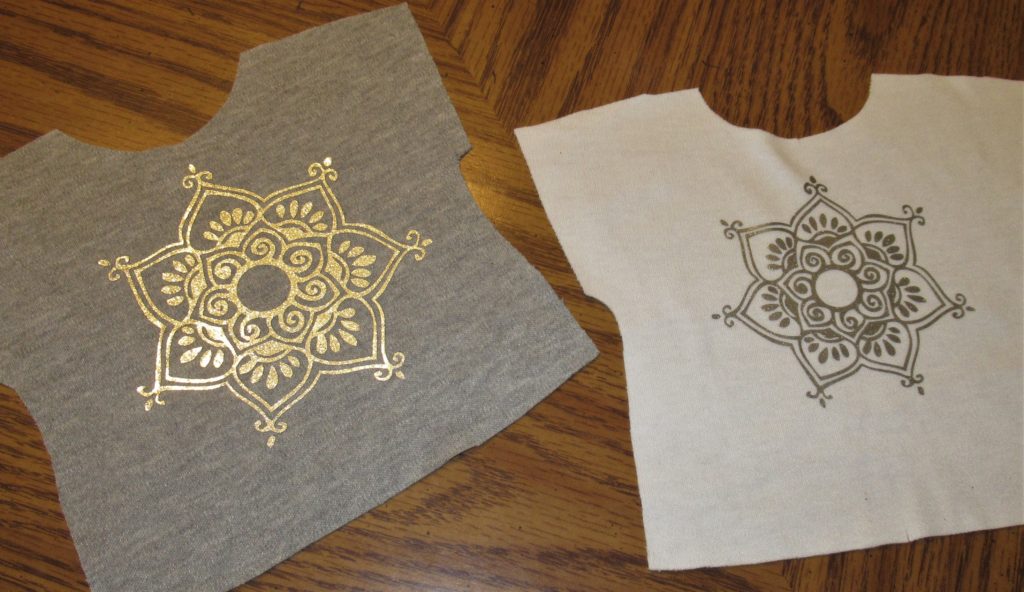
Let’s go over some info on cut files and how this all works. As previously mentioned, I used my Silhouette Cameo II to cut the mandala outlines of this project. This is an electronic cutter, of which there are multiple brands. This blog post is mainly about ink pencils, in particular combining them with heat transfer vinyl. I am assuing here that you know how to use your cutter to download or trace design images, resize them and cut them in various materials. If you do not, there are numerous facebook page groups, you tube videos and pinterest posts that can help you become more familiar. Remember that many designs are copyright protected. If you are planning to sell your finished project you should seek out designs that are free for commercial use, or pay for the commercial license offered. Many of these fees are quite reasonable.
Remember that if you do not own a cutter you could certainly use the ink pencils in a free-hand manner, just as my friend, Judy does. Simply draw! You might also be able to trace a design onto your fabric, just as we used to do back in the old ‘hand embroidery’ days.
I confess that I was so anxious to see these designs develop I did not take as many process photos to show you the ‘step by step’. There are a few…
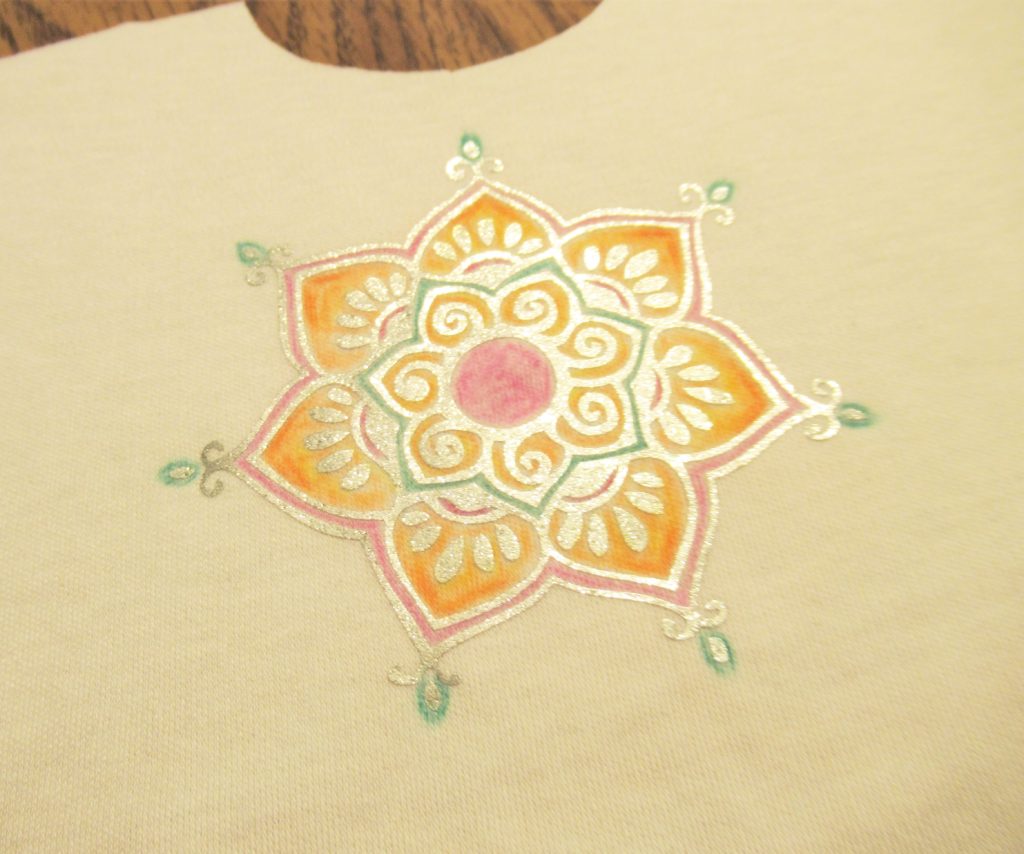
Here is the smaller design, on white, using shades of teal green, tangerine and fuchsia primarily. I was beginning to get an idea of how to accent various areas. You’ll see that I added a bit more tangerine around the points. This has not yet been activated.
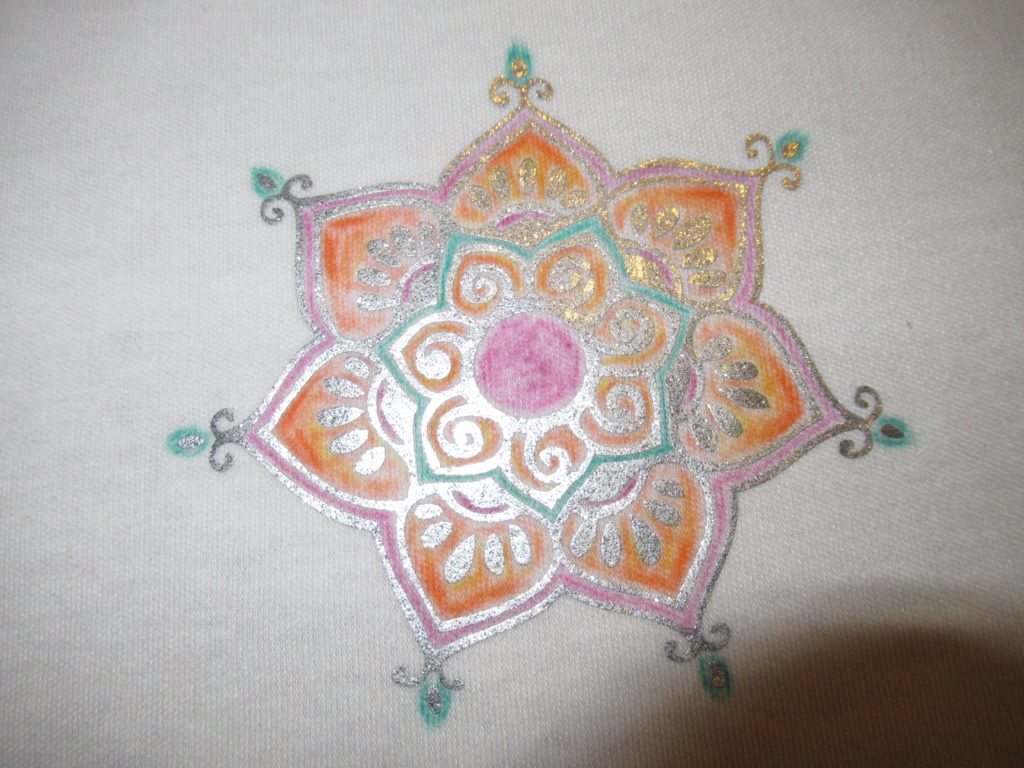
Activation is complete. I think know is a good time to apologize for the poor photography in this post. Sadly, my trusty Canon point and shoot camera bit the dust a few days back and I was taking these pics with a very old phone! The good news is that a newly ordered better Canon camera was due to arrive the next day!
Wondering what happened to the design on gray? I did not take any process photos of that one, but I did take some finished shots.
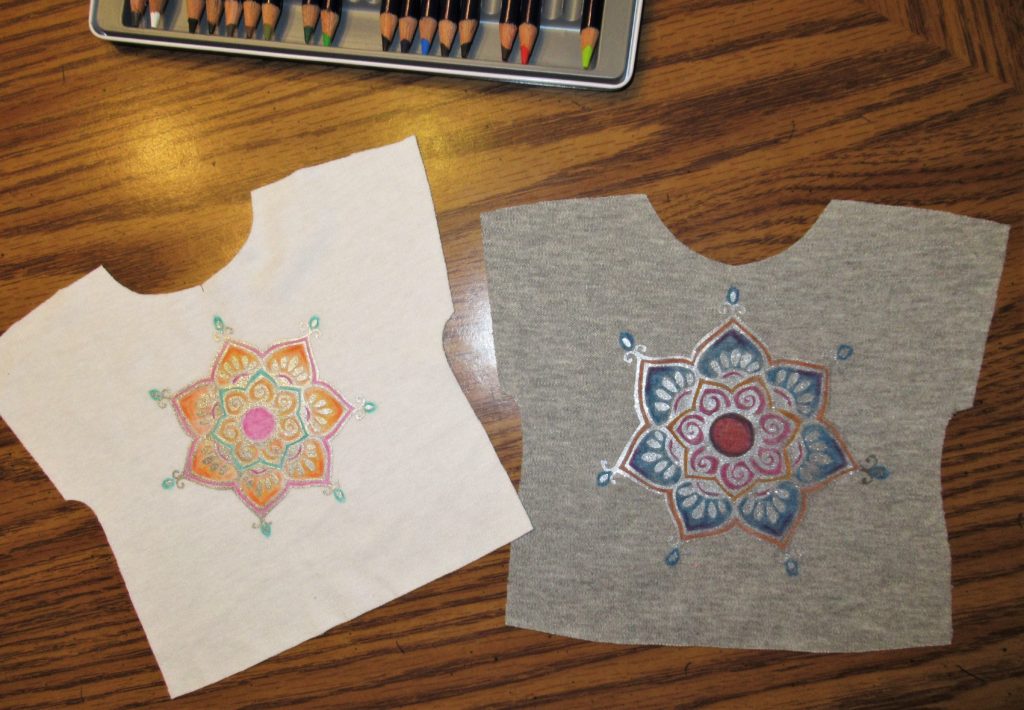
Once again, it was bedtime and time to let these completely dry overnight.
Right back at it the next day. First stitching up the tshirt and then making a pair of destructed jeans to suit it. If you like the jeans you’ll be happy to hear that these are also a ‘pattern in progress’. Simplifying the process and eliminating a few details makes these a quick stitch! BTW, my photos from here should look a little better – new camera in the house!
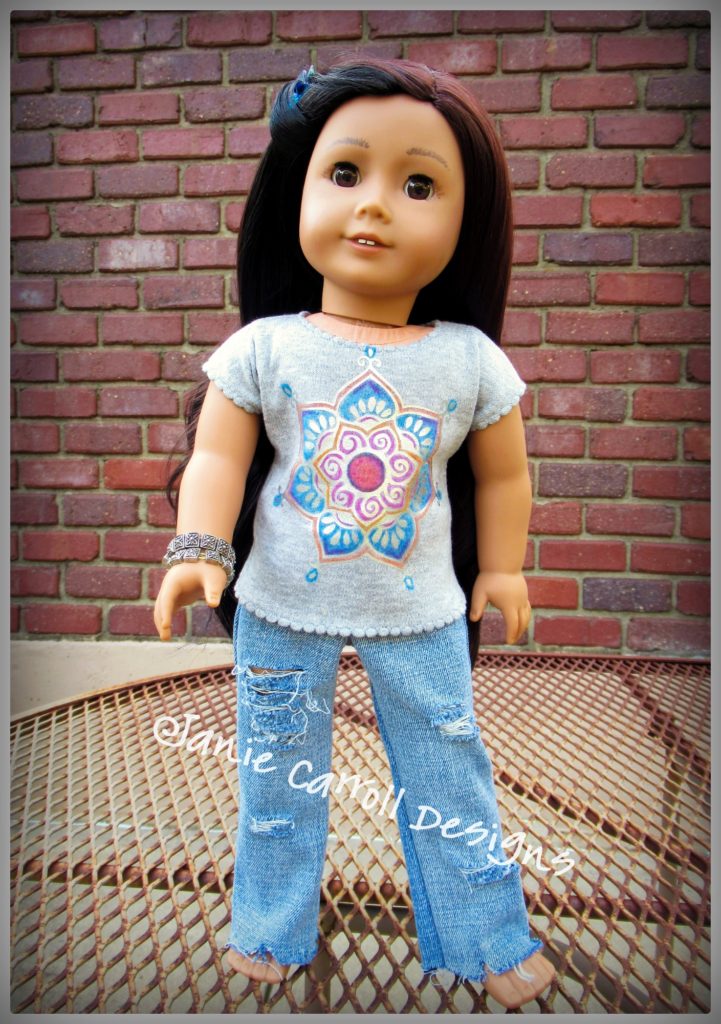
This morning I finished up the orange version, with a pair of jeans for it, too. It’s a toss up which one is my favorite. I love them both and am excited to make more. Normally I really hate making multiples of things. In this case, each one has the opportunity for some unique choices in colors, etc. that will keep things interesting. I’m also looking for more designs that will also add variety. Be sure and ask any questions you have. I’m happy to share what I’ve learned!
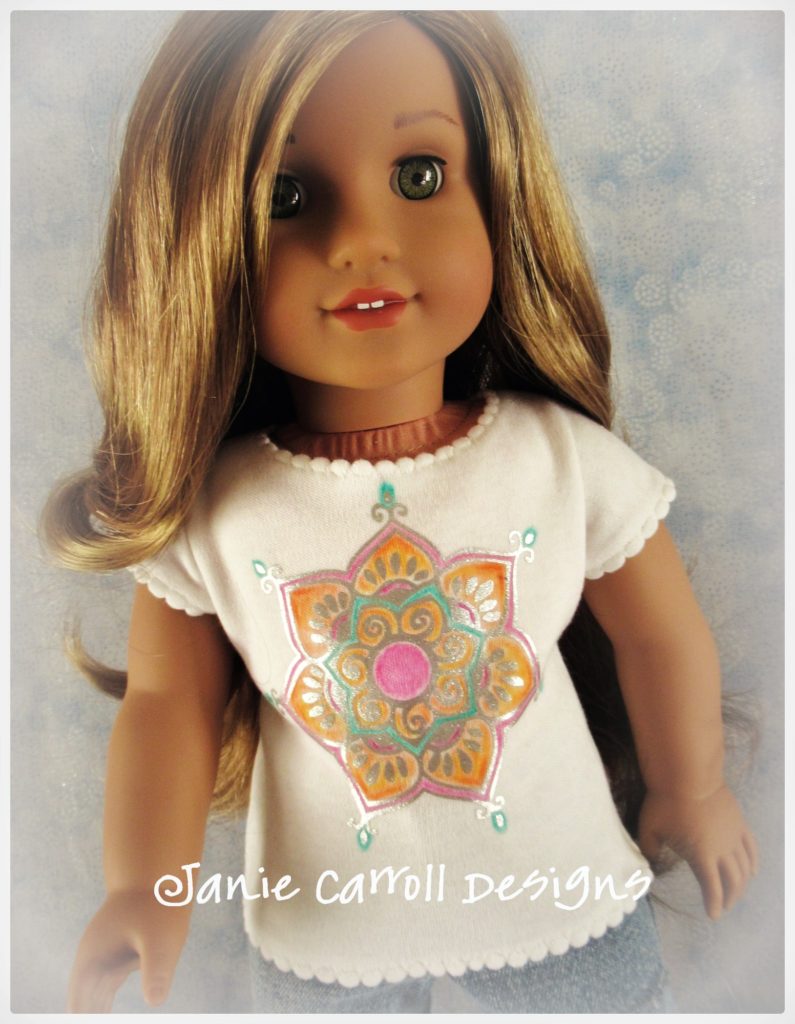
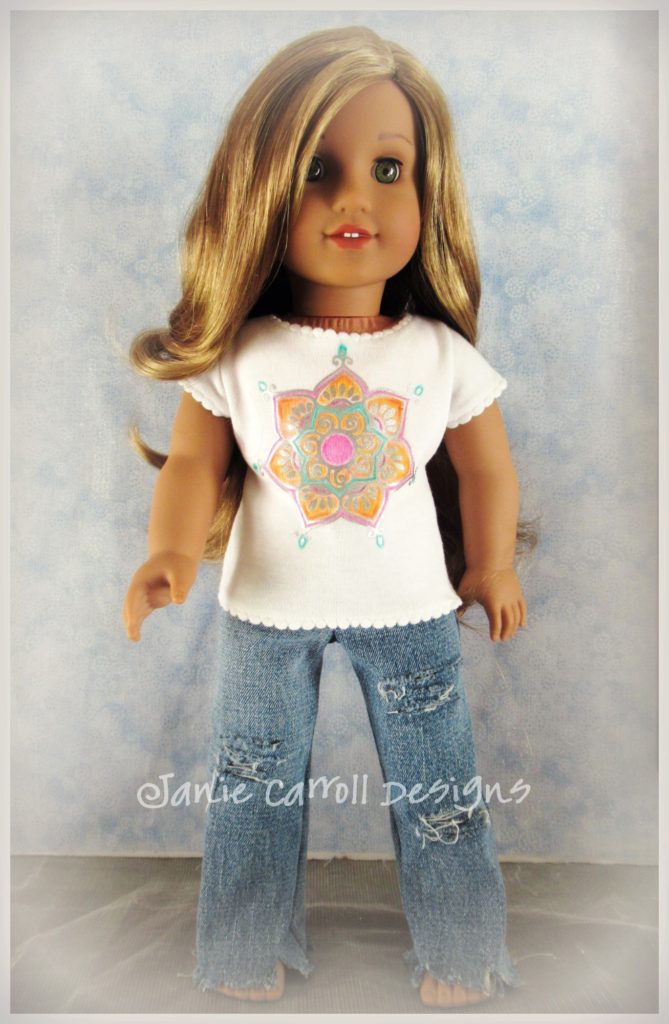
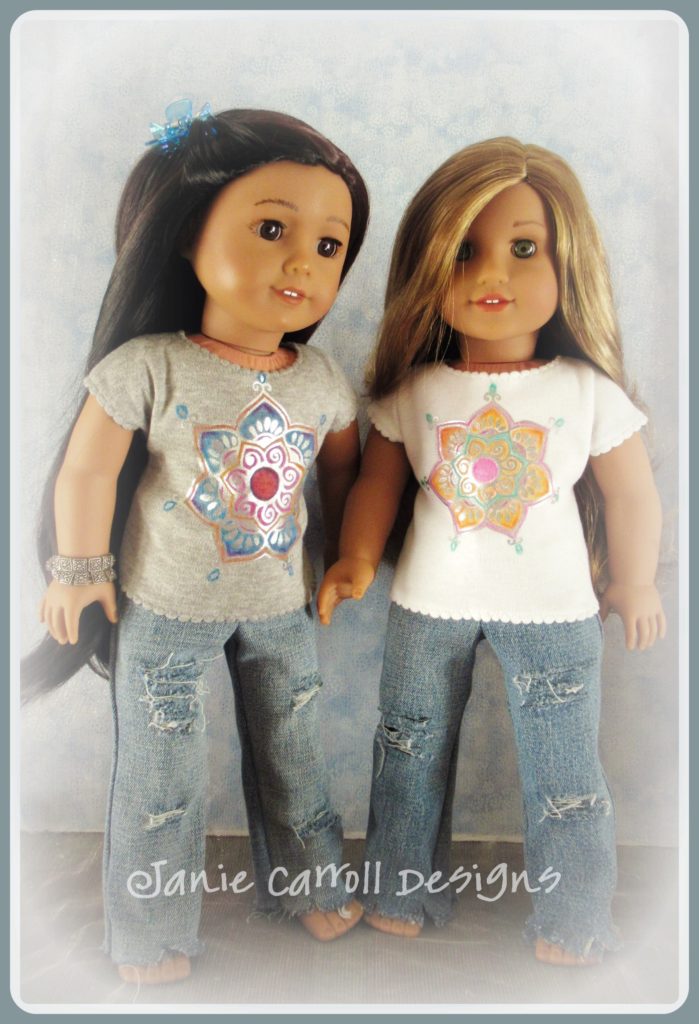
These girls seem to know how great they look!
(please note that my blog is NOT monetized and I receive no credit for any products mentioned. You may find other brands or similar items that work just as well, the suggested products are simploy those items that I have used with success. Happy crafting!)

Wow, your Ezy-T-shirts are amazing!!!
thank you so much!!!
WoW 😮
good to see you following along, Mary Beth!
Love you work and can’t wait to get back to sewing.
i hope you’ve found time to do some sewing lately, Joyce!