I recently found some cool ‘faux leather’ fabric
at the local Walmart.
I’ve since seen the same stuff at Hobby Lobby.
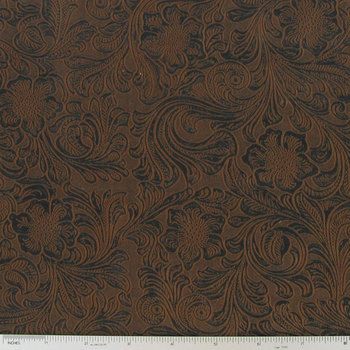
Billed as a ‘tooled suede’ it is reminiscent of an upholstery vinyl.
It has a softer, sueded surface with the embossed western tooled motif,
on a stable knit backing.
Here’s what that looks like.

It is predominately polyester and rayon with 15% polyurethane.
A bit stiff for most garment construction,
especially for dolls
BUT
I couldn’t resist trying out an idea.
Since the fabric was 54″ wide I bought only 1/4 of a yard to test.
Noting the firmer quality of the fabric,
I knew any garment design should have very simple lines.
Excessive seams and details would only stand out
in a rigid and unflattering way.
My mind turned to my recent Super Skort + pattern.
This one:

Familiar with this one?
If so, you know that the pattern calls for 4 way stretch fabrics
with a high degree of stretch and recovery.
How would that work with this, seeing as how
the fabric has very little stretch?
Obviously, modifications would be called for.
Let’s digress, for a moment.
Remember all that math
that we all purport to hate?
Those dreaded story problems?
Consider this idea
To solve a problem,
always begin with the things you already know!
How does that apply here?
The side seams would need to be wider
to make up for the lack of stretch.
The invisible waistline would be preferable
for a smooth line.
Waistline elastic would be a necessity.
A hem would simply add un-necessary bulk.
the spanky underneath would still need to stretch.
For my first try, I printed the skort pattern pieces ‘as is’
but did not cut them out.
Next I drew in new side seam cutting lines on the skort front and back.
These were each just 1/8″ wider than the original cut lines.
Not at all difficult to ‘eyeball’ and draw in.
Choosing to use the ‘micro mini’ skort length,
because this is admittedly a ‘modern cowgirl’ style,
I cut out the garment front and back.
The spanky was cut using the original pattern, from a standard swim fabric
which was a polyester/Spandex blend.
The point is, you need the 4 way stretch for the spanky.
There’s no way around that idea.
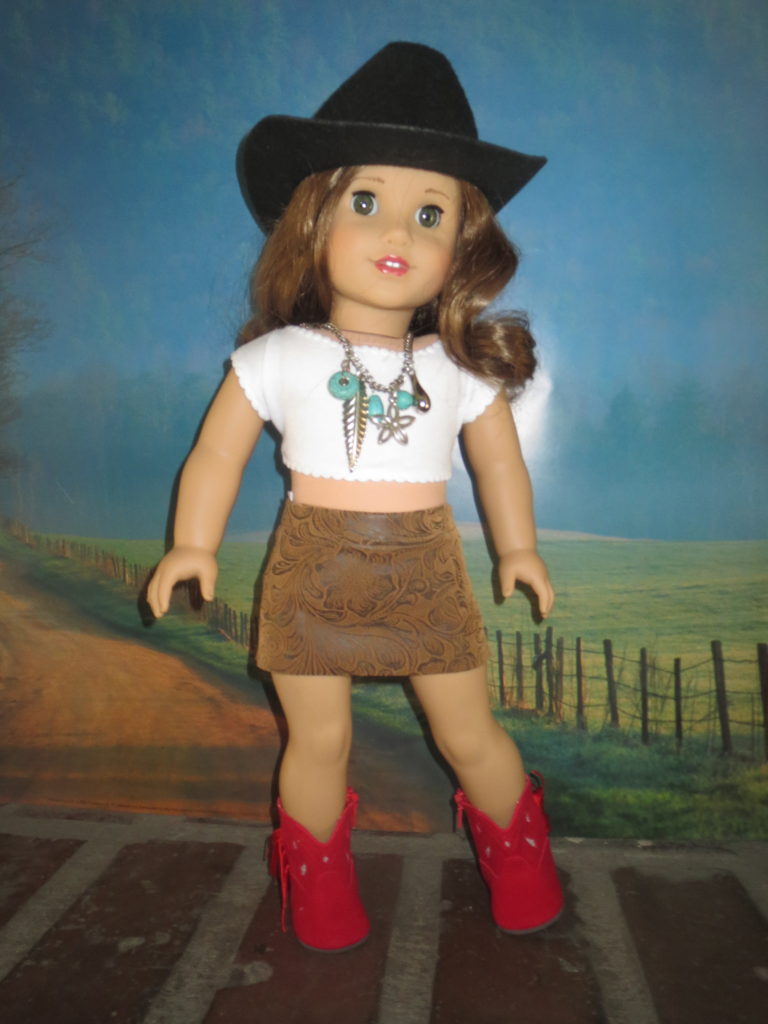
Here’s my first sample:

Very close!
not quite right.
Definitely a little too tight
and possibly a little too short!
(I had trimmed away the original hem allowance from the micro mini length)
She does have her spanky under there, so you may prefer this very abbreviated look.
I decided it needed to be just a scoonch longer.
NEXT UP: Draft #2
It was clear that the IDEA would work,
it just needed a little ‘tweaking’.
I added a sliver to each side seam.
At this point, the new cutting lines for the front and back side seams
are note quite 1/4″ wider than the originals.
This may not sound like much
but let’s think about that, too.
Since there are 2 side edges on the skort front
and two more on the back?
This means that any change made to these edges is a multiple of 4.
Altogether, this means that over 3/4″ has been added around the garment.
It is still fitted, but it is no longer an uncomfortable
girdle for poor Rebecca!
As to the cut length?
The second sample was cut on the micro-mini cut line and nothing additional
was trimmed off.
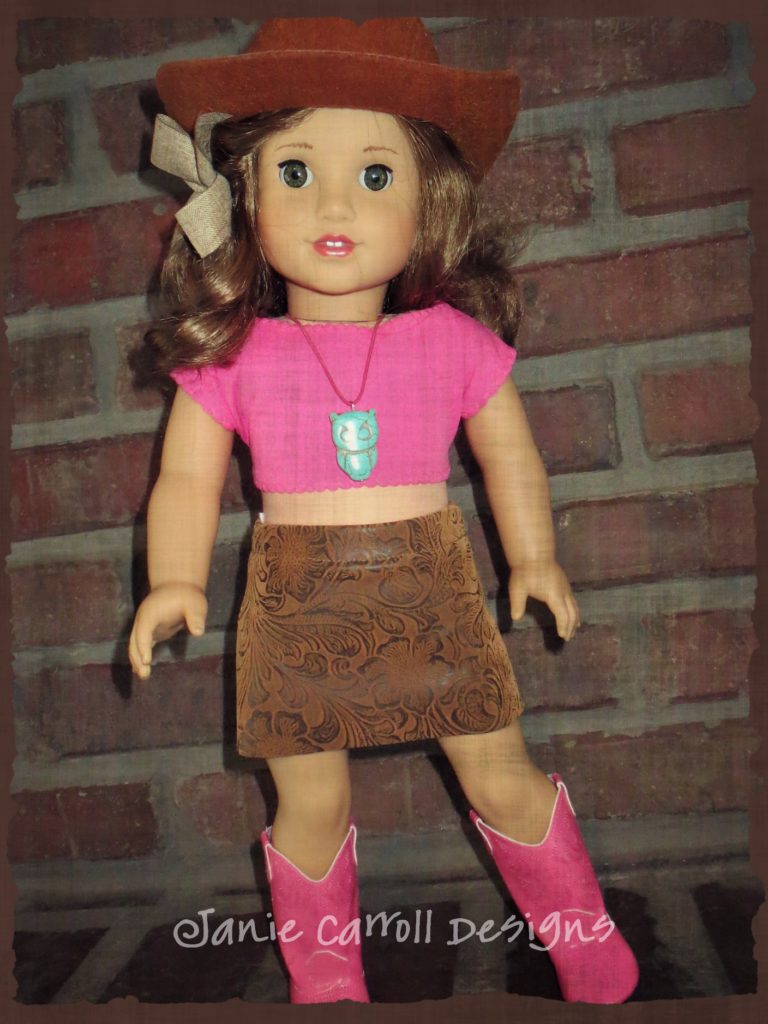
Here’s the second trial,
which works quite well.

Anything you need to know about construction?
Simply follow the original pattern instructions.
You remember those?
The ones you’re actually supposed to read before you make a garment?
yes.
Those instructions.
lol.
You’ll note that the spanky may still seem a bit big and that
it may be difficult to stretch the vinyl enough to match everything
up around the upper edge.
Guess what?
Both of my samples have a couple of very tiny ‘tucks’ in the spanky at the waist edge.
They don’t show on the finished garment
and they just aren’t that important.
If they bug you too much you can take a wee-bit deeper seam allowance
at the center back of the spanky.
here’s a back view for you:

Obviously, this opens up a world of new fabric possibilities for the Super Skort + pattern!
Don’t be afraid to try a few things with your patterns, Friends.
It’s important to note that any changes, or ‘hacks’ you make to an existing pattern
should not be considered a new pattern.
You really cannot claimfashion such a change as your own ‘new design’.
It is, however, also important to note that
FOR YOUR OWN USE
you have the right to use your patterns in any
fashion you wish.
Changing or adapting them as you like.
Incidentally, if you like the crop top shown here,
getting this look is simple, too.
Begin with your Janie Carroll Designs Ezy T.
which you can find here:
Ezy T pattern for standard 18″ dolls
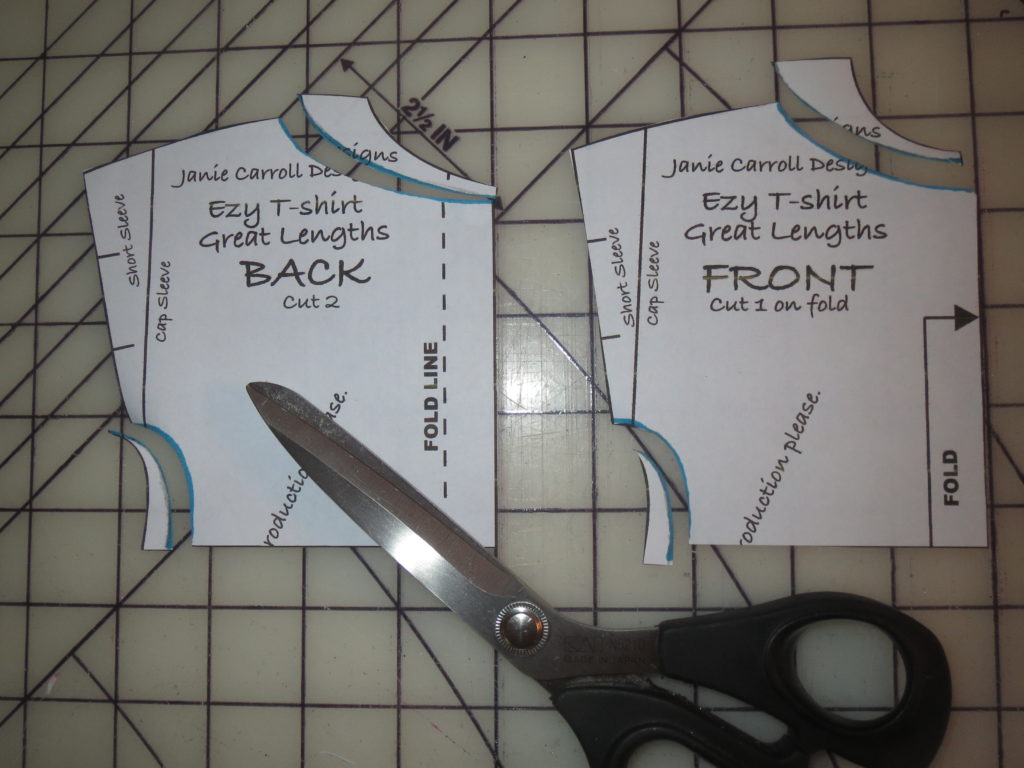
Make a photocopy of the crop length top.
Draw in a new cutting line along the side seams, and along the neckline edges, as shown here.

I haven’t given exact measurements but you should be able to get a clue from the photo.
The difference along the lower side seam is approximately 1/4″.
The difference at the shoulder line is about 1/2″
These changes result in a more fitted cropped T
with a wider neckline.
It isn’t quite ‘off the shoulder’
but it’s close!
I hope you’ve enjoyed this mini ‘hack’ and that it will
encourage you to experiment with some of the patterns you own.
I do have some parting thoughts for you.
Experiments like these don’t always work,
but often, you’ll find they are quite successful.
Learn to think of your less successful
ventures as valuable lessons
and not as ‘failures’.
If I’ve left something out and you need help, be sure
to ask any questions you have!
Happy sewing!

You are so creative. I like it very much.
Fun idea!