Broken Threads, needle woes & skipped stitches – oh, MY!
You’ve been sewing along, living a happy life when
Suddenly, the thread just keeps breaking! Or you’ve got skipped stitches
or maybe it’s the needle that’s breaking for no apparent reason.

Let’s talk about some of the possible culprits and work on
Finding Solutions in Oz…or right at home!
We’ll talk about the three problems listed above in combination,
as they often travel together. First of all:
Keep calm and observe your project with an objective eye.
Knowledge is power!
With any issues regarding needle problems, or stitching irregularities
Here are some question and answers in no particular order:
Is this a fabric you are un-familiar with? Some fabrics are more trouble-prone than others. Lightweight, synthetic blends, loosely woven fabrics and many knits can be problematic. Fabrics with unusual surface qualities, such as faux-leathers can (literally) be sticky to sew. One of my all-time biggest bugaboos was heat-bonded sequin fabric, also known as confetti sequin dot knit. Because I cannot go into every possible fabric type and solution I suggest you use a search engine (such as Google) to look for specifics related to fabric choice. Try a phrase like ‘skipping stiches sewing Pleather’ or ‘what needle for sewing cotton/lycra jersey knit’. You should receive several possible entries that address your question. You might have to read two or three of the suggested posts but you will most likely come away with lots of information. Alternately, you could ask for advice on a sewing related Facebook page, or search on pinterest for tutorials or related articles.
Is the needle and bobbin inserted correctly? Take the needle and bobbin case out of the machine and put them in again. Is the needle all the way up in place and seated correctly? (the flat side should be facing the back of the machine). Is the bobbin thread un-spooling in the correct direction? Not all machines are the same for this purpose! It may need to turn clockwise or counterclockwise. Do not guess, or assume anything! If you’re not certain on any of these points, get out your manual and look.
When was the last time you changed the needle? In an ideal world, you should change the needle with every new project. I know that some of you only change the needle when it breaks. How about a ‘happy medium’? I change my needle with every 3rd project, or after approximately 8 to 10 hours of sewing. I’ve also learned to listen for problems. Yes, you read that right. I can hear when the needle is becoming dull. It will make a ‘thunking’ noise when it pierces the fabric! (it’s actually painfully dull at that point!) If I find my thread shredding or breaking, a needle change is my ‘go-to’ first option. There may be damage to the needle eye, or a burr may have formed on the needle tip that is damaging thread.
Re-thread the machine and try a different bobbin. It’s quite possible that your machine is simply threaded incorrectly or your bobbin may have wound in a less-than-ideal fashion. I seldom have problems with bobbins, but I’ve heard that inexpensive machines sometimes have bobbin winders that are in-consistent. It’s definitely worth a try.
It’s possible that your needle just needs cleaned. If you’ve recently changed the needle but you’re sewing with a bonded-sequin-knit or any type of bonded interfacing, temporary spray adhesives or basting tapes it’s possible that your needle has been ‘gummed up’ with residue from these products. You can clean the needle with a bit of rubbing alcohol on a cotton ball.
While you’re at it, is the needle the correct size and type for your fabric? These days, many fabrics can be handled well with a ‘Universal’ point needle, which has a very slightly rounded tip. A size 80/12 will work for many mid-weight woven fabrics and t-shirt knits, but
One needle hardly meets the needs of all fabrics!
I get better results with jersey and interlock t-shirt knits using a ‘Jersey’ labeled needle. Likewise, swimwear lycra blends will perform best with needle labeled ‘Stretch’. These are both type of ball-point needles, with slight differences that can make a difference with stitching.
Here’s an excellent chart from one of my favorite needle brands; Schmetz. I suggest you familiarize yourself with various sizes/types of needles and their appropriate applications. Here’s a link that is highly informative, with more info than you may ever need!
http://www.schmetzneedles.com/all-about-needles/
How about cleaning and/or oiling your machine? Been awhile since you tried that? Get out your manual and read up on the process. When I made a change to a Bernina brand machine I was shocked by one difference. This machine is very finicky about being clean! It will begin to sound subtly louder and it’s telling me it wants the lint brushed out of the bobbin case and a drop of oil added to the bobbin shuttle. While yours may vary, all machines do require some maintenance and your stitch quality will visibly improve.
Let’s talk about threads next…
Are you using ancient thread? Or, perhaps a low-quality, no-name thread? Machine repair techs will tell you that there IS a difference in threads! Low quality threads are generally spun of very short fibers which ‘lint’ excessively. They also break more easily. Likewise, if your thread is ancient it may be past it’s prime. If it has ‘dried out’ excessively, been exposed to heat, etc. this will cause breakage and shredding. Some threads have a waxy coating which can build up on machine parts over time.
Are you beginning to feel better about finding answers?
how about a few more tips?
There’s no need to call for flying Monkeys!
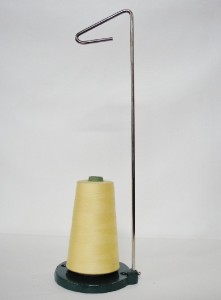
Try a thread stand for specialty threads. Metallic threads, as well as some embroidery threads can be notorious for breaking and/or shredding. These threads can benefit from having a longer path to travel before reaching the needle. This gives them time to un-wind and relax – sounds funny, right? It works! You might want to search on pinterest for ‘home-made’ thread stand ideas but here is a photo of a commercially available stand. Set this behind your machine, bring thread up through the loop at the top and then continue on to thread your machine as usual. You’re simply by-passing the built-in spool pin.

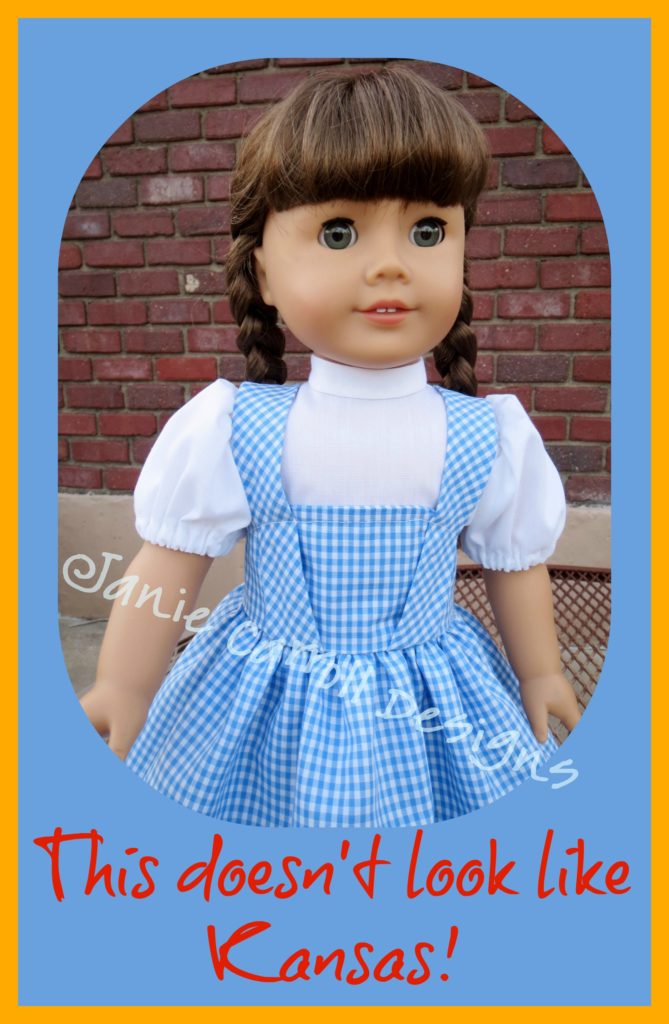
Back to tricky fabrics – have you tried ‘Sewers Aid’? This product is really a near-miracle cure. I receive no endorsement from any company but this product is absolutely amazing! I found it when I had taken a custom order for this outfit:

The finished outfits look great but believe me it came along with plenty of sweat and not a few tears! I was using a size 80 jersey needle, which should have been fine for this fabric, but the skipping stitches were so numerous there was no way the garment was going to hold together! I was really tempted to give up!
NOT an option – it was promised for Halloween!
I decided to google the problem and was immediately pointed to this product. Turns out, I’d already purchased some but never had occasion to use it! I was completely skeptical. I couldn’t believe the solution could be so simple. A stripe or two of this invisible liquid applied to the thread spool?
IT WORKS!
I now sew with confetti sequin dot knit on a regular basis and find it a breeze! Be aware, if you’ve sewn this fabric with no issues? Brands are not created equal – those with smaller dots seem less likely to have issues. In any case, this product serves to lubricate the needle and thread and this reduces frictions as the thread moves through the needle. This reduces or eliminates skipping, shredding and breakage. It’s also wonderful for machine embroidery work.
You can find Sewers Aid on the notions aisle or in the quilting department at JoAnn Fabrics or you can purchase it online through Amazon. here’s a link: http://www.amazon.com/Collins-Sewers-thread-sewing-smoother/dp/B001W2GL76/ref=sr_1_1?ie=UTF8&qid=1460485112&sr=8-1&keywords=sewers+aid
What if you’ve tried all of this and you still have a problem?
If you’ve gone through this entire list, and you’re still having problems, you may have an issue that will require a trip to the repair technician. You may have a bit of thread caught in an inaccessible area of the machine. if you’ve hit a pin while stitching (never sew over pins!) your machine may be ‘out of timing’ or you may have caused a burr to form on the edge of the needle throat plate or the bobbin case. Deep cleaning and/or adjustments may be called for. I recently hauled out my 30 year old basic machine to use in a crisis. I cleaned and oiled it prior to use and it sewed ok but the stitch quality just wasn’t what it should be. I was continuing to have skipped stitches no matter what I tried. I gave up and took it for repair. Turns out I had made a small mistake when I stored the machine. I left a bobbin in the bobbin case, in the machine. Over time, this had damaged the spring on the bobbin case. Replacing the bobbin case brought me back to perfect stitching!
Exhaust the basic possibilities before you give up! There is so much we can on our own personal journies through OZ and home again! Consider these tips your traveling companions and the repair technician as your Wizard! Together, you can do SEW much! Happy Sewng, Friends!
 .
.

Very good advice and nicely written. Thanks for the “links”. Love “Dorothy’s” dress.
Thanks Jane! So much information! Love your blog!
I wish I’d known about that liquid when I was sewing my daughter’s munchin soldier uniform for her part in (coincidentally) the Wizard of Oz. What a nightmare those dots were.
Good article, Jane! One other thing people can try is a mini vacuum on both regular sewing machines and sergers. I bought one several months ago and I can’t believe how effective it is at keeping my machines clean. Heres a link to the one I bought: http://www.amazon.com/Metro-Vacuum-MDV-1BA-DataVac-Computer/dp/B00006IAOR?ie=UTF8&psc=1&redirect=true&ref_=oh_aui_detailpage_o00_s00
Just another tool in my ever-expanding tool kit.
Sounds like a great suggestion. Most repair technicians agree that canned air is a ‘no-no’ but a vacuum can be very effective! I am considering editing this post in future to add a few things I missed and this definitely qualifies.
I’ve read that canned air can force lint and threads deeper into the machine, and can also introduce moisture where there was none before. For these reasons, I’ve never used it.
Right! It is not recommended.